Replacing a Stuck O2 Sensor
Joe Angell
UPDATE January 2023
I’ve added a video for this, as part of dealing with stalling problems. I found the oxygen sensor had failed, and hoped it would fix the stalling, but it didn’t. It was the throttle position sensor jumper that had come loose. The video covers this in more detail, as well as why cars have oxygen sensors and what they do.
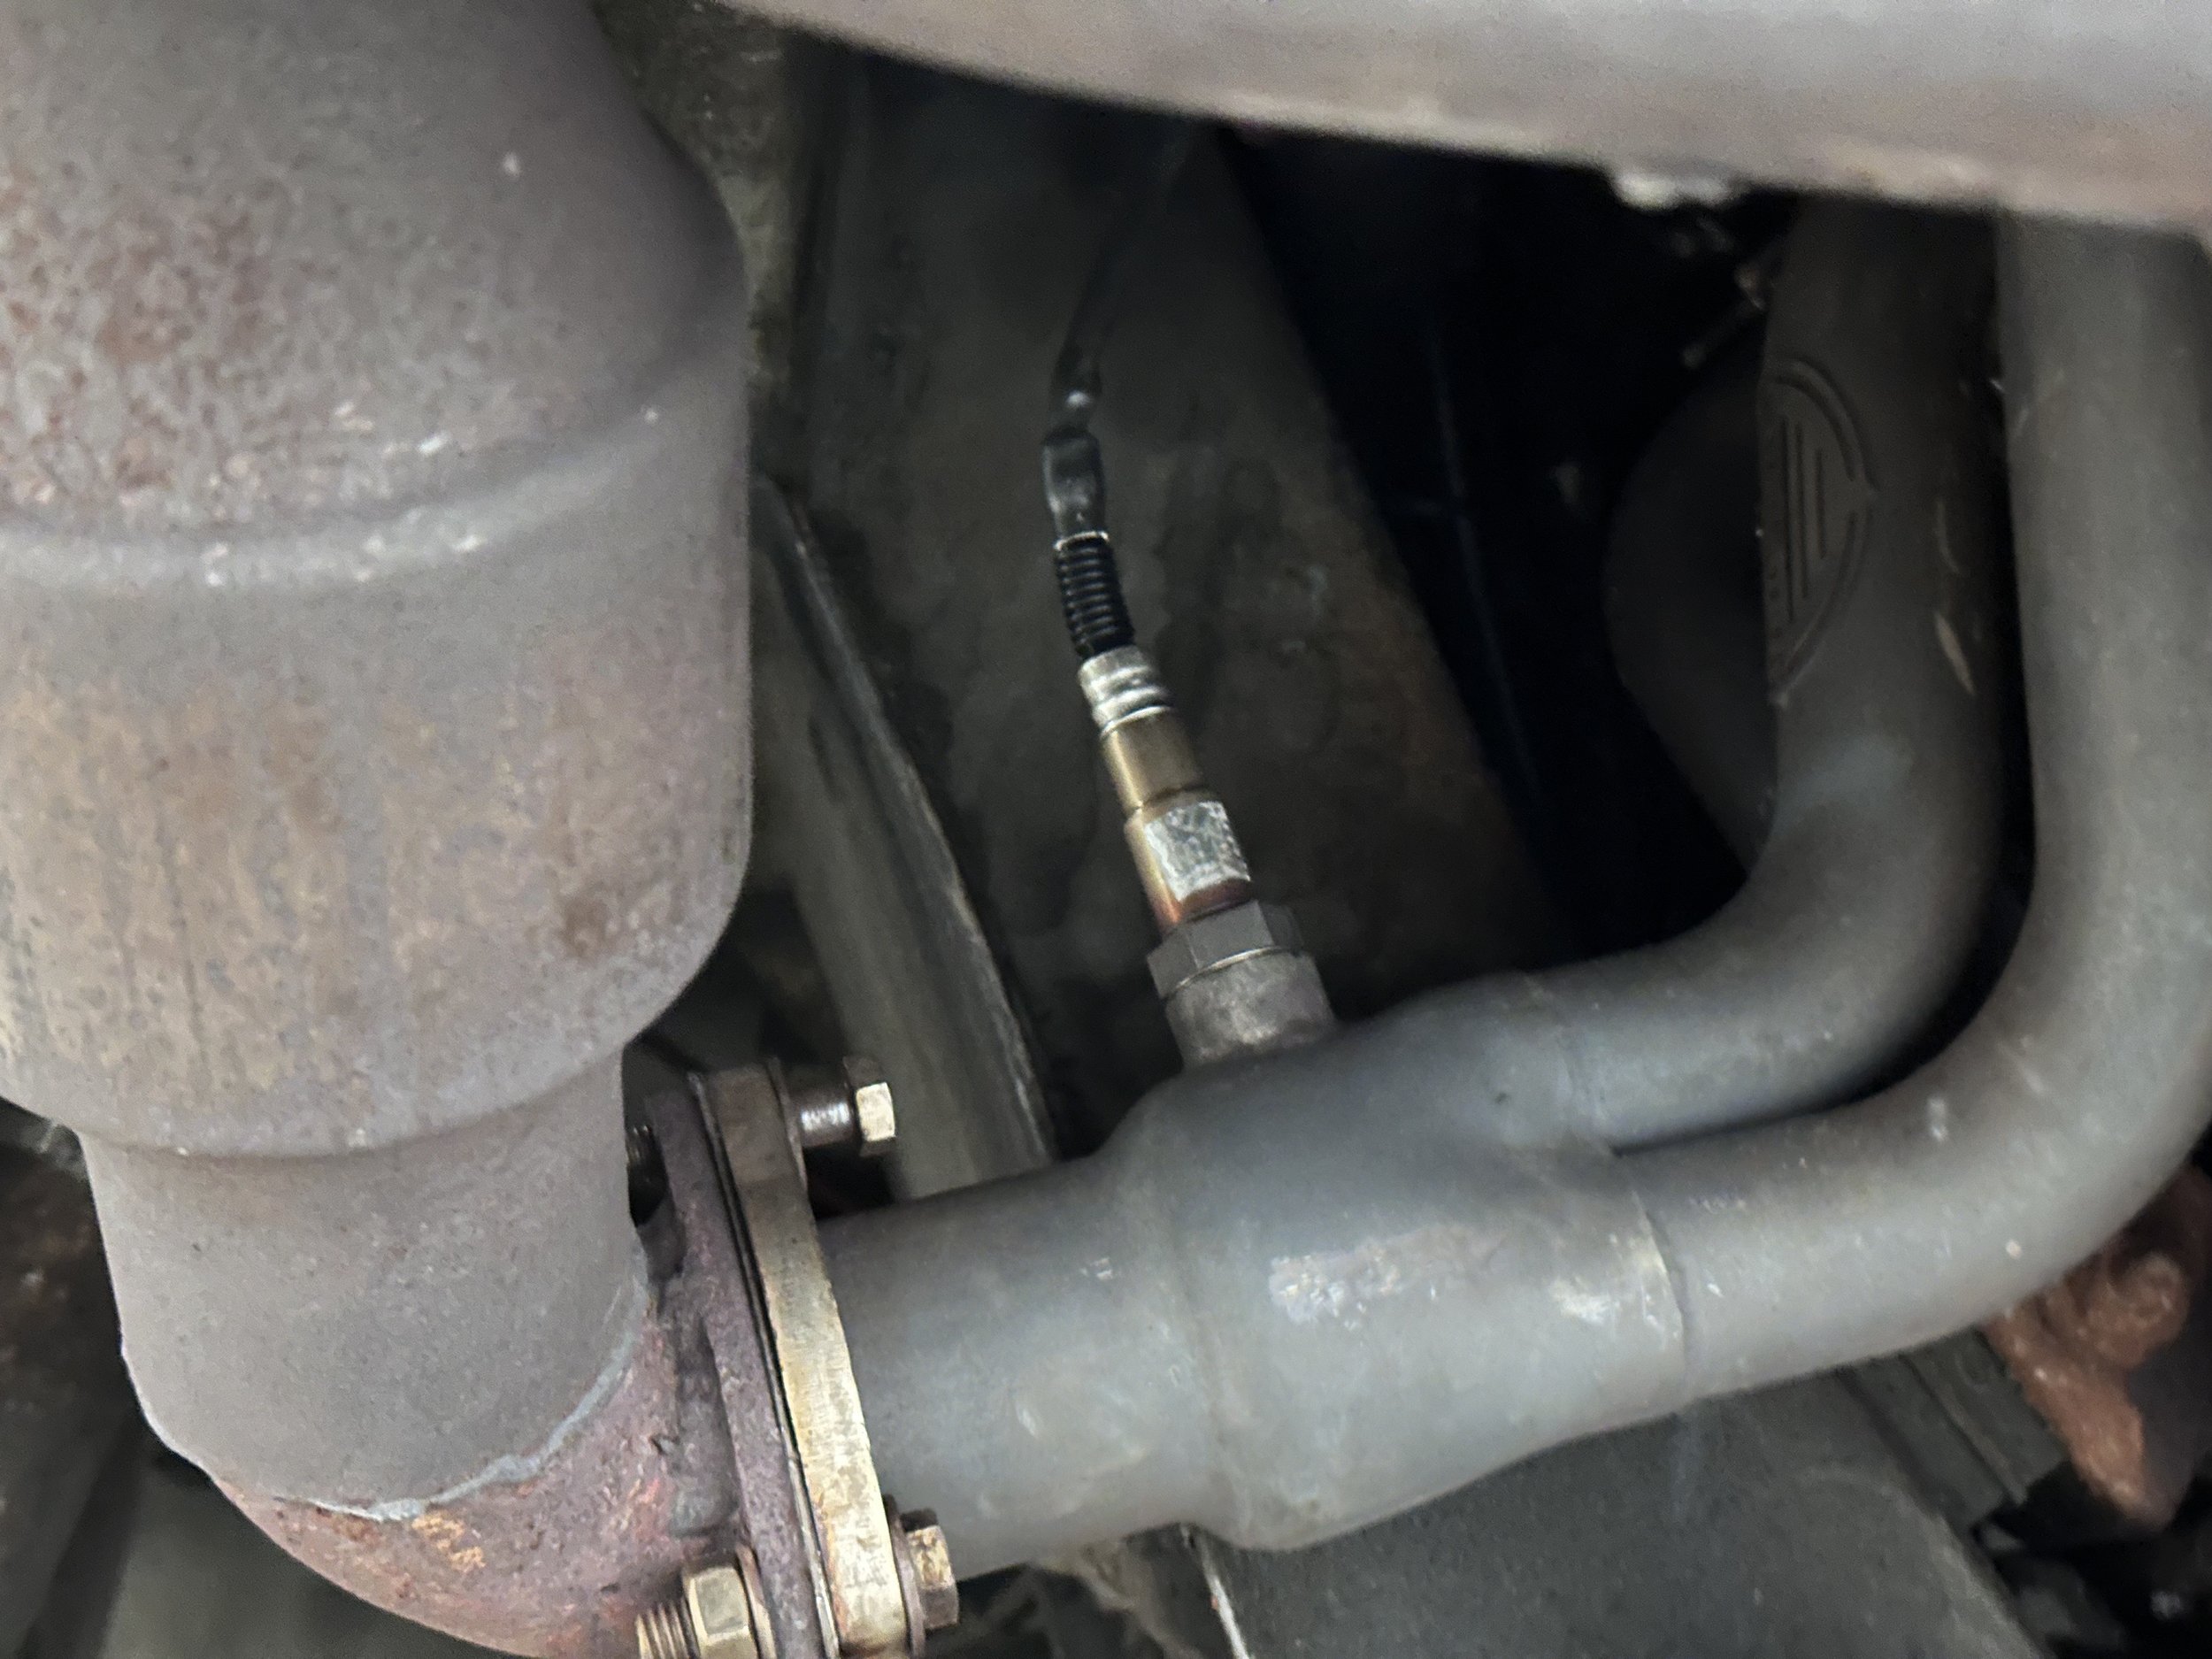
My wideband O2 sensor for MegaSquirt had been reading zero recently. Since the O2 sensor is used for closed-loop idle and optimal fuel economy, I wanted to get it working again.
I have an Innovate LC-2, and a quick check of the status light showed two red flashes, indicating no connection to the O2 sensor. The connection was good, so the sensor was probably dead. so I ordered a replacement LSU 4.2 compatible sensor from Amazon, along with a cable to the LC-2 just in case that was damaged as well.
Removing the Old Sensor
This should have been simple: put a wrench on the O2 sensor and it pops right out. Mine wouldn’t budge. I resorted to a cheater bar on a 22mm crow’s foot open-ended wrench, but I still couldn’t get it to turn. Worse, this attempt rounded the hex of the sensor.
I then went through everything else possible to get it out.
Penetrant
First I sprayed it with penetrant. I tried PB Blaster and Kroil, and tapped the sensor with a hammer. This had no effect at all.
Heat
I tried heating it with a MAP torch until it glowed red, but still nothing. If I had a rosebud for my oxyacetylene torch I would have tried that, but I’m not sure it would have worked.
Box Wrench
After grinding the hex back but into shape with a Dremel, I cut off the connector and slid on a box wrench, which I should have done in the first place to avoid rounding. It still wouldn’t budge.
Wrench and Hammer
I tried hitting the wrench with a hammer to shock it free, but still nothing.
O2 Sensor Socket Set
I next bought a basic O2 sensor socket set from Amazon. These sockets are open on the top and have a slot for the sensor wire, but that slot can cause the socket to flex when turning the wrench. You can work around this by putting a hose clamp around the socket to constrain the flex. This still didn’t work.
Everything All At Once
I tried various combinations of penetrant heat from the exhaust being hot from driving the car, and heat from a MAP torch, but still nothing.
Drilling
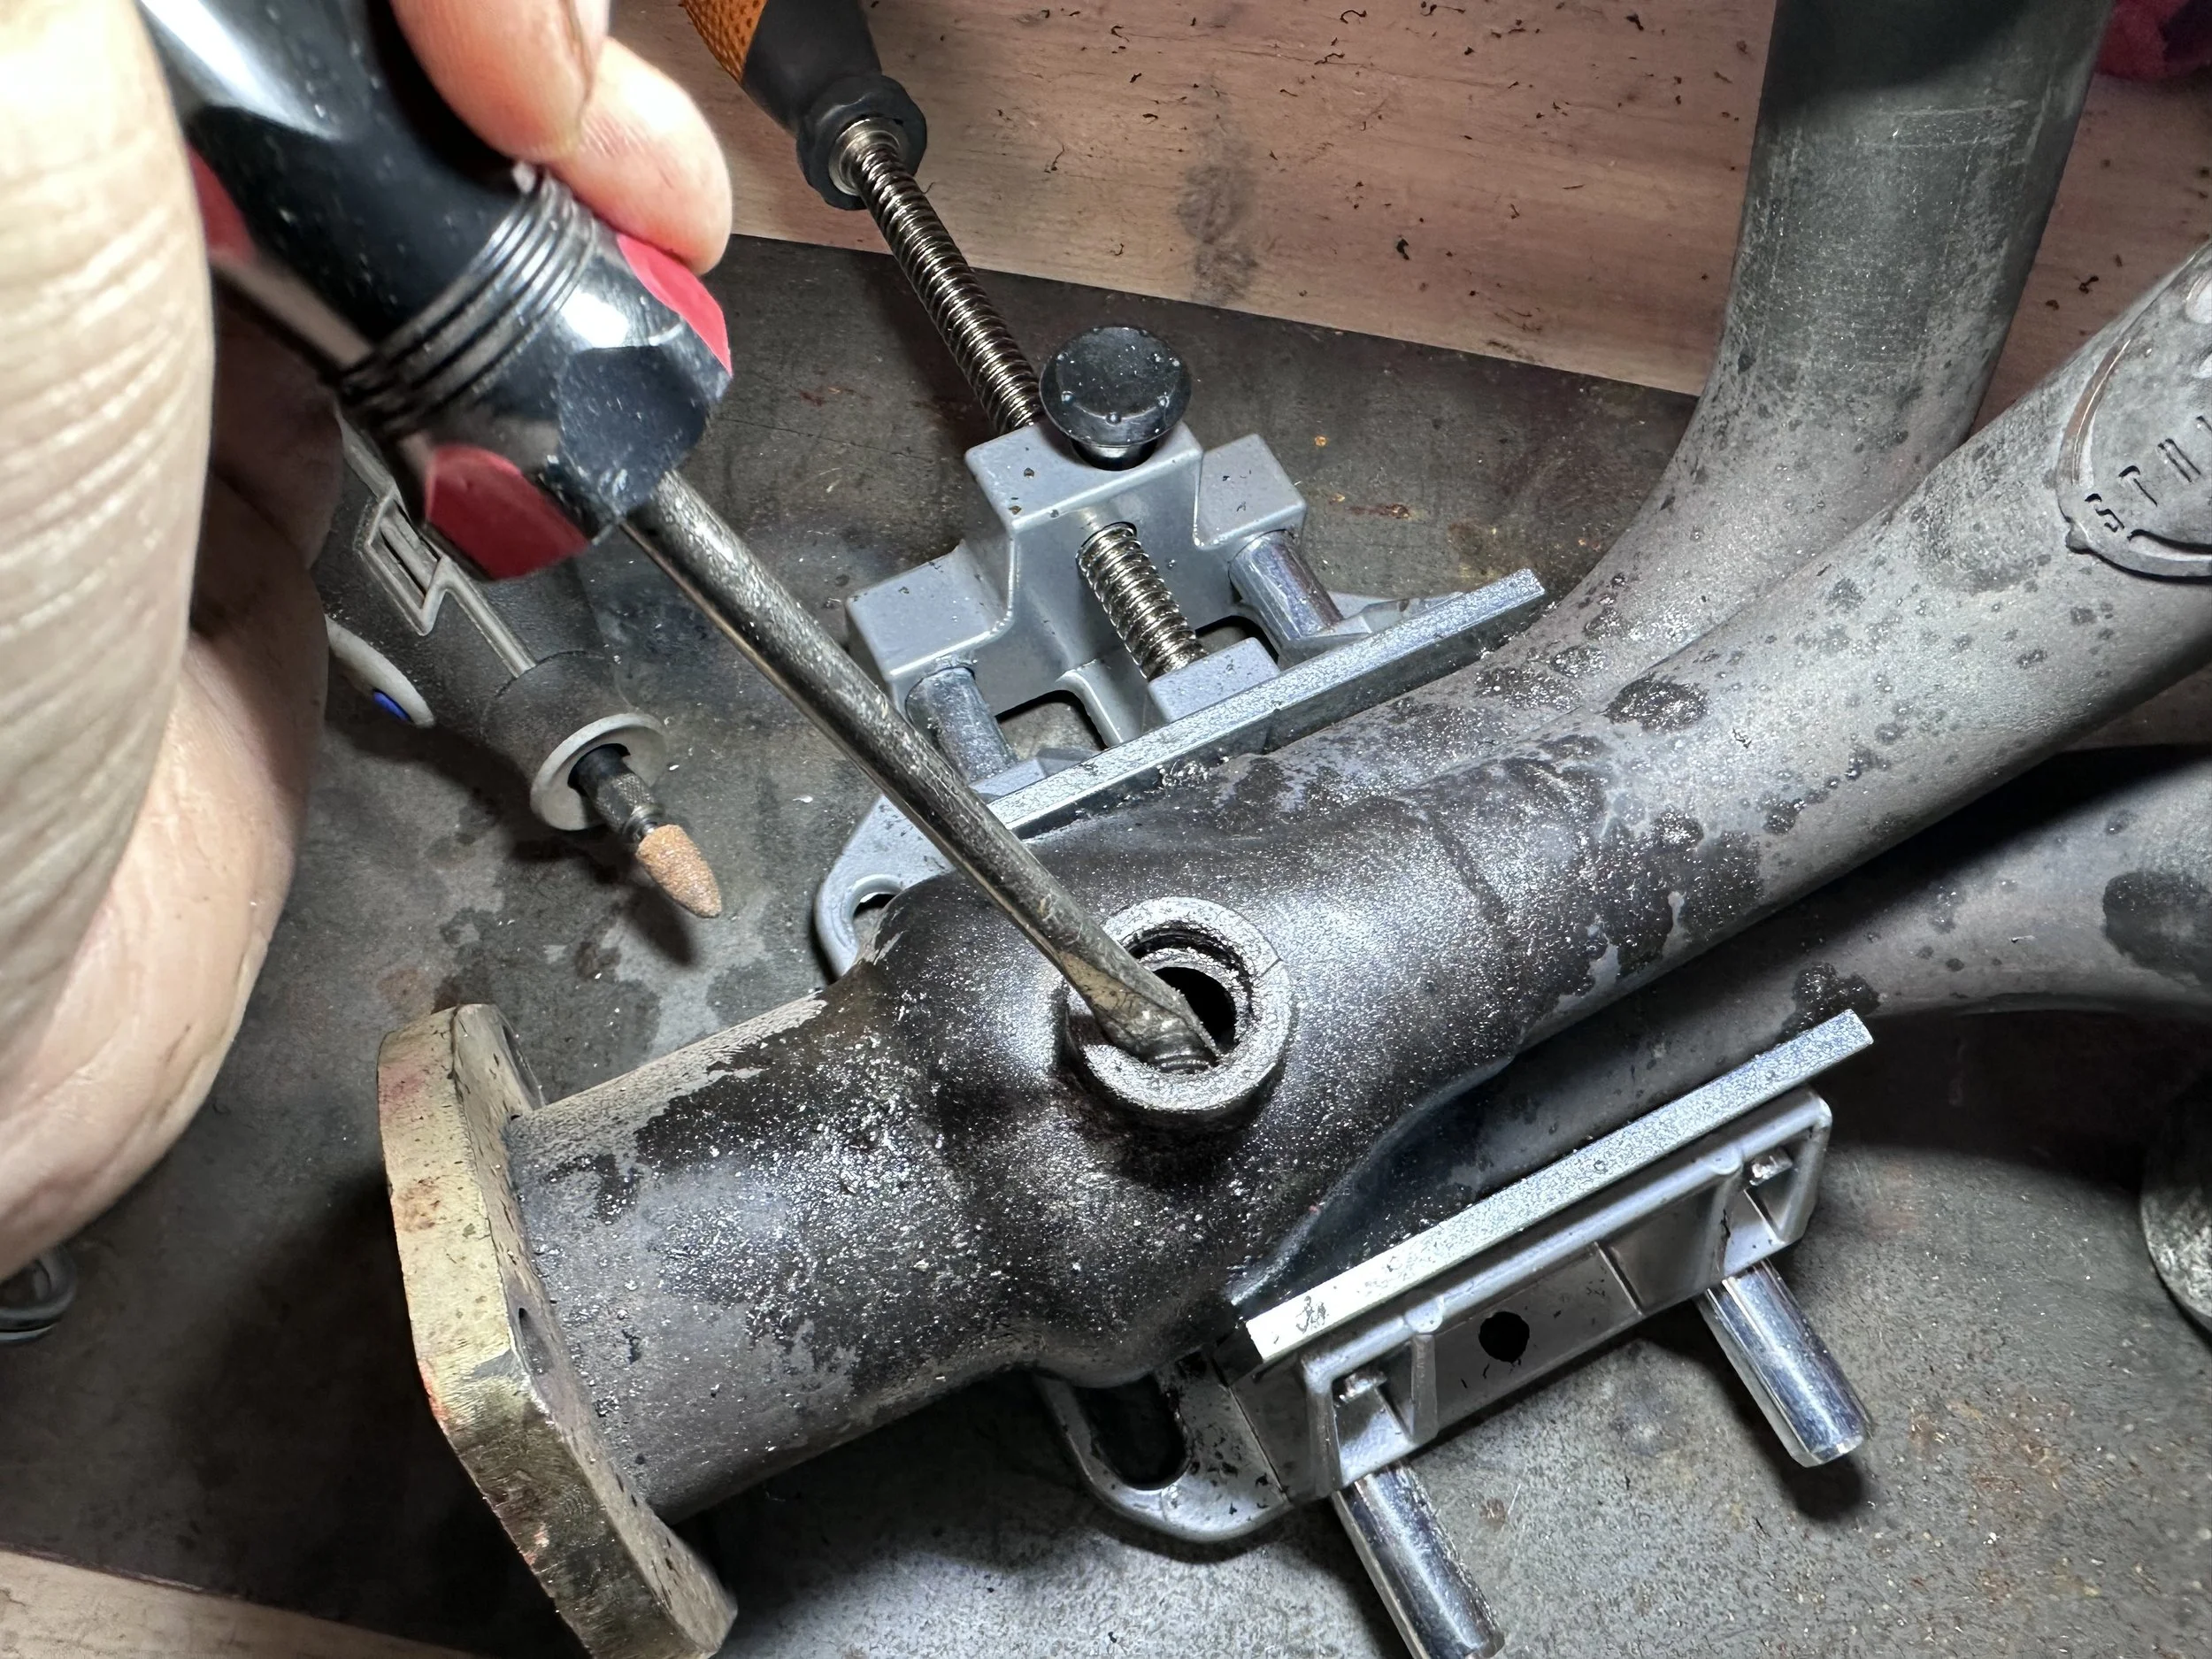
I finally resorted to removing the header and drilling out the sensor. My DPI header is attached with 6-12 10mm nuts (6 stock, but you can six more per header if you really want to), plus three 11/16” (17mm) nuts and bolts that attach the collector to the catalytic converter pipe.
My first attempt at drilling went poorly. I had clamped the header in a vice and used my drill press to get even pressure and a clean angle on the sensor. Instead of cutting through the sensor, my drill bit glowed orange and melted against the plastic inside.
I resolved this problem by melting the center of the sensor with the welding tip of my oxyacetylene torch. It made a nice orange puddle, but there was no way to remove the material in there, nor was it possible to try welding on a nut on because of all the plastic.
I finally moved back to the drill press and went back to carefully drilling it out, stopping if I saw any orange glows and making liberal use of cutting oil. This worked, starting with small bits and moving up to successively larger bits until I ran out of bits. It was close enough, though, and I didn’t want to damage the reads in the sensor anyway.
To remove the final ring-shaped millimeter or two of sensor material still stuck in the header, I tapped it a flat head screwdriver and a hammer. It eventually tipped and fell into the collector Finally, the sensor was out. I rinsed the header out with water from the garden hose to keep any drilling debris from clogging up my catalytic converter.
O2 sensor socket set. Note how the socket wraps around the hex while leaving a slot for the cabe.
Using a screwdriver to knock out the remaining ring of sensor material.
Cleaning the Threads
Before installing the new sensor, I ran the threads with the chaser that came with the O2 sensor socket kit. There was some residual metal from the old sensor that was basically bonded with the threads, and I had to use a socket wrench and later a light-duty impact gun to get the chaser to work, causing it to cut new threads through that material. There was enough friction here to heat up the chaser. I ran it in and out a few times, getting further down each time, until the threads were mostly clear.
Calibrating the Sensor
The sensor needs to be calibrated in open air before first use. Since the LC-2 was reading “no sensor” (two red flashes), it was already in “ready to calibrate” mode. I simply rested the sensor on the roof of the car, plugged it into the controller, and powered it up up (ie: turned the key to “Run”). The controller flashed green while it warmed up, then gave me the “calibrated” flashes before going solid green, and that’s it.
The solid green light means the sensor is warped up, calibrated and ready to run.
Installing the New Sensor
This was fairly painless. I installed the sensor on the bench, since I still had the header out. While the sensor came with anti-seize on the threads, I added even more before installing it. I don’t want to deal with this again.
I used the O2 sensor socket to screw the new sensor in until it was flush. The new threads weren’t cut as well as I’d have liked, so I had to use more force than I probably should have. Hopefully this won’t make it too hard to remove later.
Reinstalling the Header
With the sensor in place, I put the header back in the car. I replaced the collector-to-catalytic-converter gasket, but I was out of new exhaust gaskets and just reused those for now.
The car sounds fine (so, the O2 sensor is properly seated), and I’m getting readings again from the O2 sensor in TunerStudio, so things are definitely looking better.