Front Lower Arm Support Braces
Joe Angell
Some of my front suspension vibration issues came back (not too bad, but still annoying), and having run out of ideas I decided to install some front suspension braces.
There are a few models out there. A couple months ago I helped Adam Harriot install DeLorean Industry’s braces (Spec Front Lower Arm Support), which feature adjustable turnbuckles. I decided do go with slightly less expensive but non-adjustable DeLorean Europe ones purchased from DeLoreanGo (Front Lower Arm Support Kit).
Design and Packaging
Neither the DeLorean Industries nor DeLorean Europe ones come with any sort of instructions. Adam found a video from DeLoreanTech explaining how to put them in which explained how to arrange the hardware (which is important, since they are just a bag of parts), as well as a useful trick for how to install them without removing the springs, which is just to use the new bolts to tap out the old bolts. This ensures that the suspension is (almost) always supported from both ends. When we did Adam’s car, one end of the arm or shock might slip down and we’d have to pry it back in line so we could continue tapping the bolt in, but that wasn’t a big deal.
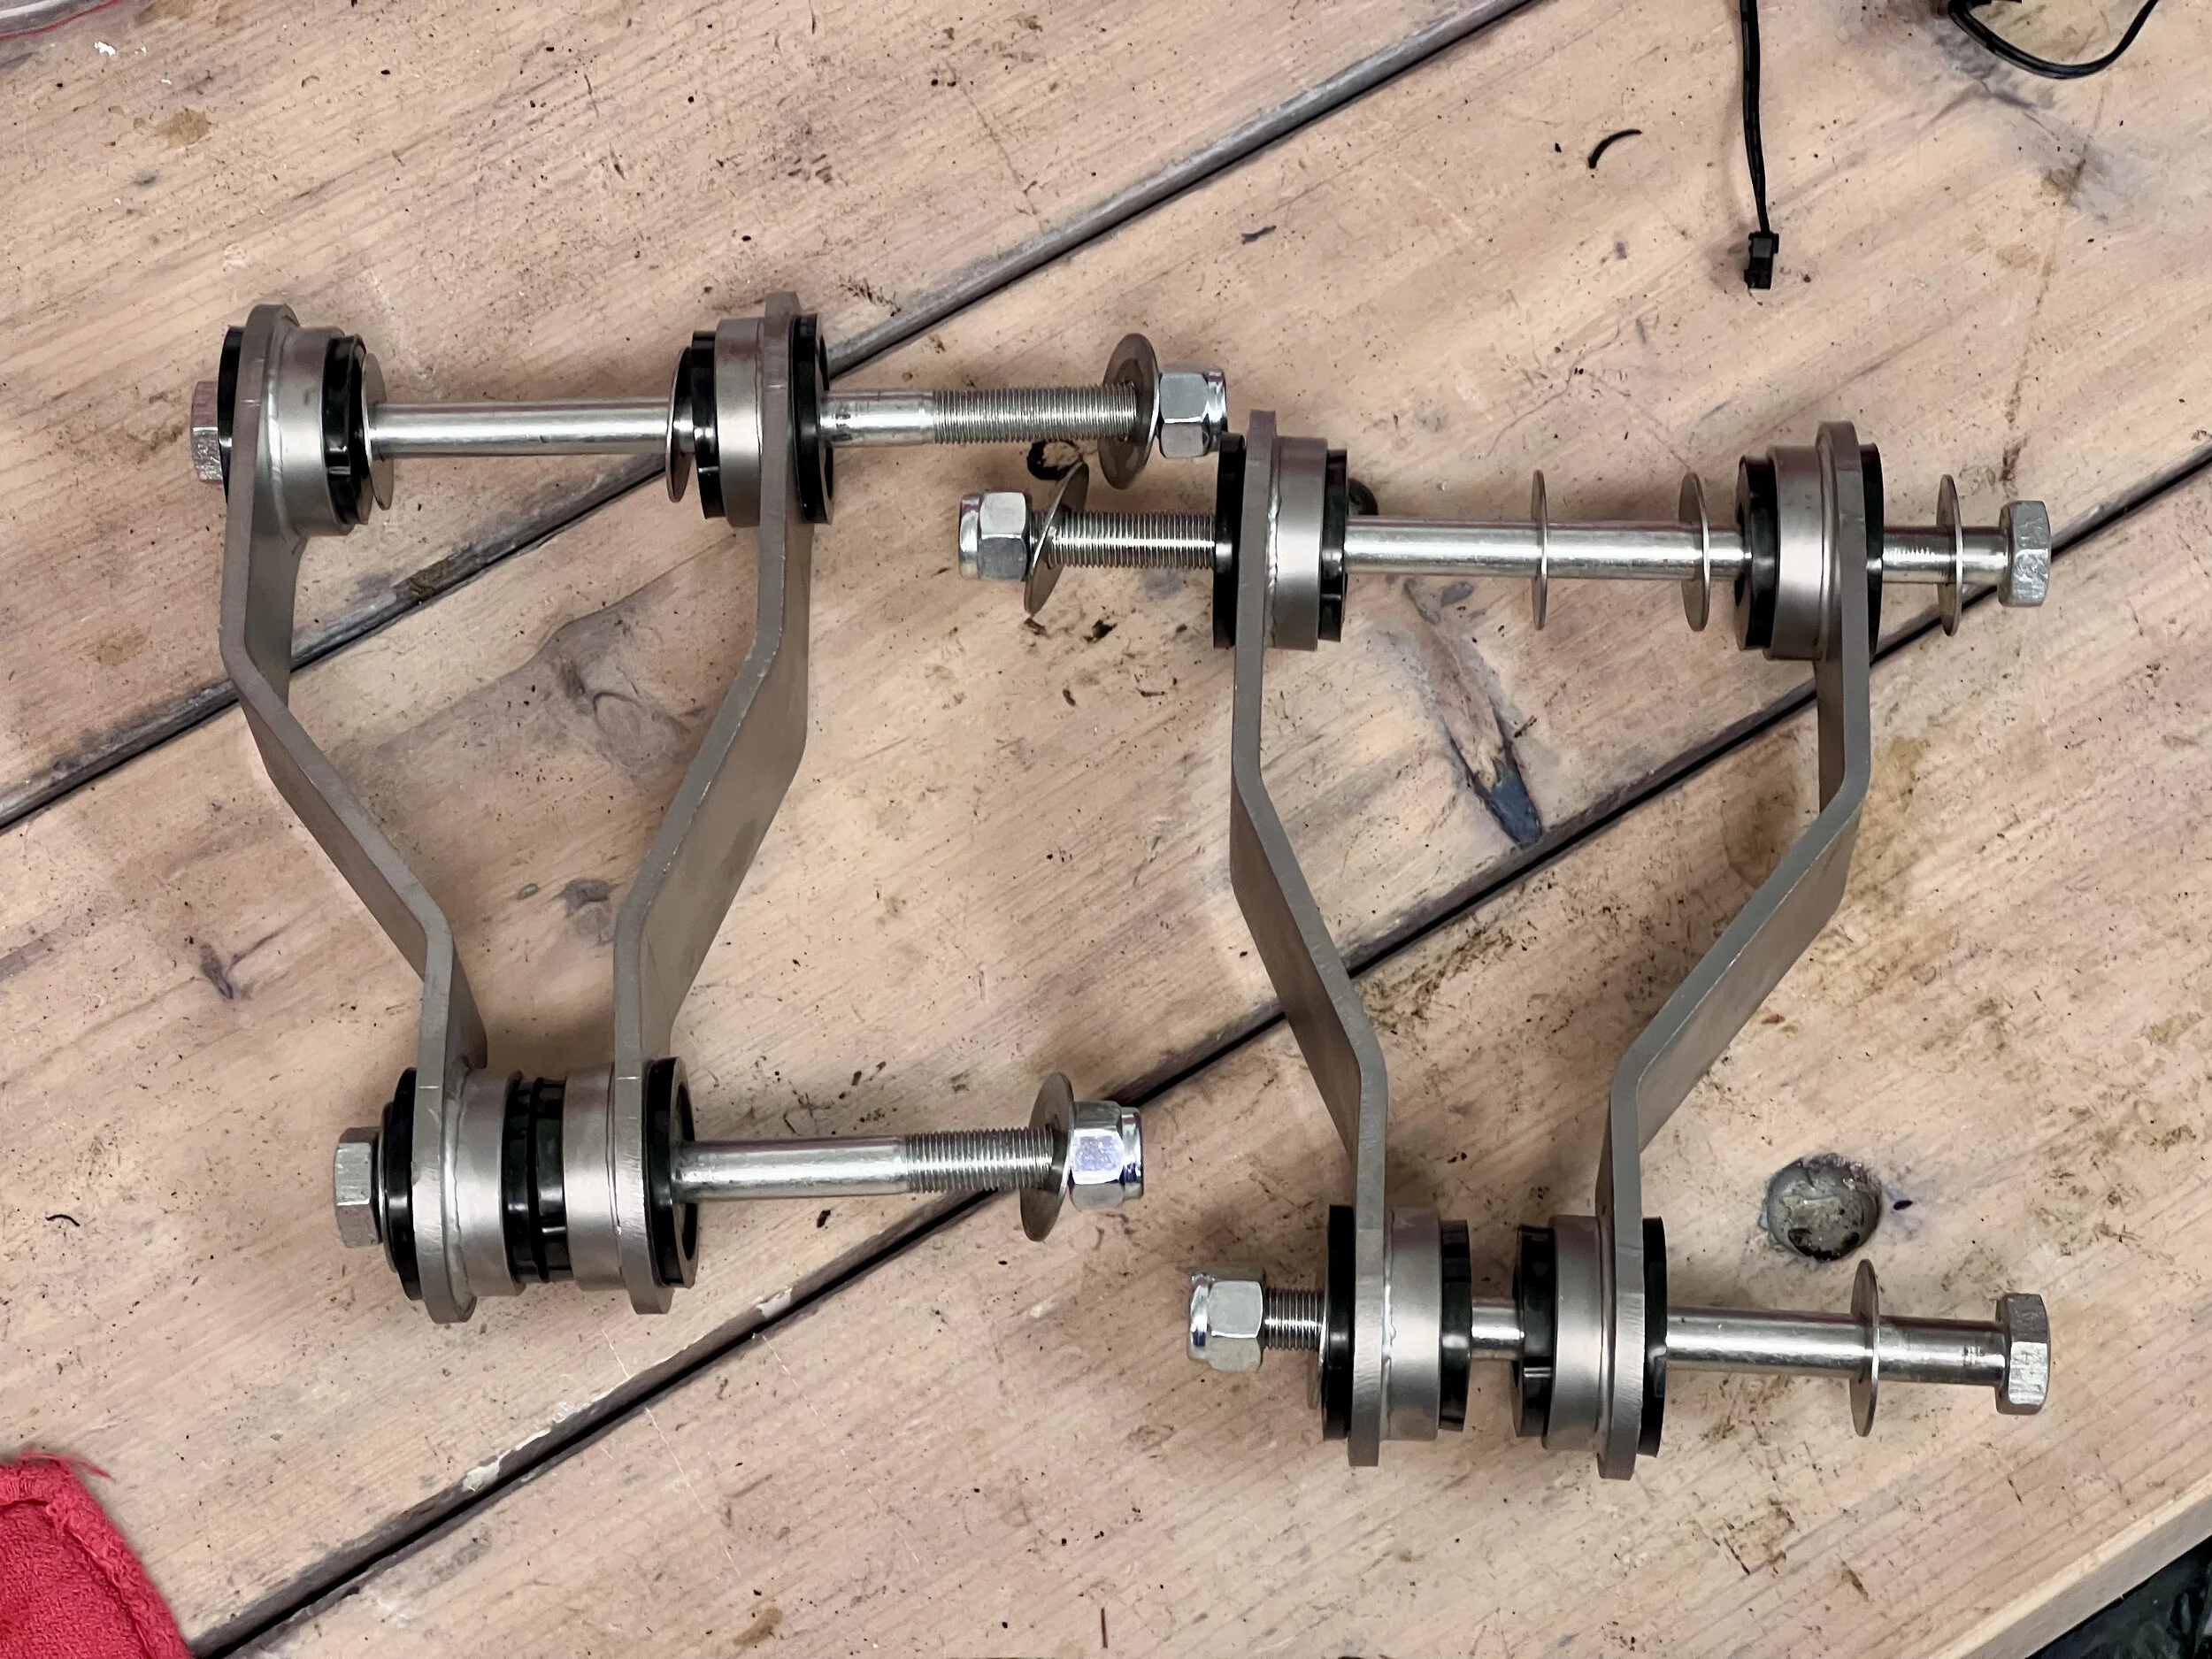
The DeLorean Europe braces come pre-assembled, so there’s no question as to what order the parts go in. A note on the ordering page mentions that the rounded parts of the braces should point down, but that’s about all the help you get. They’re quite thick chunks of stainless steel, much more substantial than I expected.
The pre-assembled DeLorean Europe supports. Notice the washers between the bushings on the wider ender, at the pivot of the control arm, which helps reduce squeaking from the suspension.
Installation
The only tools needed for this are a (preferably) brass hammer (to avoid damaging the bolts as you tap them in), a 19mm socket a 19mm box wrench to second socket, and a 22mm socket. The DeLorean Europe bolt heads are larger than stock, hence the 22mm socket, but the nylocks use the 19mm socket.
After raising the car and removing the tires, remove the existing nuts from the lower control arm pivot bolt and the shock (the sway bar isn’t in the way, and can be left attached).
Pivot Bolt Side
Next, tap the threaded end of the pivot bolt on the end of the lower control arm with the brass hammer until it is flush with the frame.
Disassemble one of the supports. If you hammered the bolt from the back of the car towards the front, you’ll want the wider brace first; if you tapped from the front, you’ll want the thinner brace. You can confirm this by looking at where the LCA sits in the frame. The pivot spacer things are wider in the back than the front.
Put a washer on the end of the first support, place it against the frame, (making sure the rounded parts of the support are pointing downwards), put on the second washer, and run the the bolt through both the support’s bushing and the hole in the frame and into the control arm shaft. You won’t get very far, because the old bolt isn’t out yet. If you are going from the front of the car, you must put the support up against the frame, not against your bolt held, because you won’t be able to get the support past the steering rack once the bolt is through otherwise. If you’re going from the back, this is less important, as there isn’t anything that will interfere with it.
Remember, the order of parts at this point is: washer, support, washer, bolt.
You can now start tapping the head of your new bolt with the brass hammer, pushing the new bolt in and the old bolt out at the same time. If all goes well, the new bolt will go all the way through and the old one will fly out and land on the ground. However, the control arm my drop slightly at one or both ends, in which case you’ll need to get a pry bar to shift the arm to line the holes up. If necessarily, remove the new bolt and use a punch though the hole to pry it to the right angle while holding it with the pry bar, then insert the new bolt again.
Don’t do anything with the other side yet. We have to do the shock bolt first. Also, don’t tap the bolt all the way through, since you need some slack to get the other end of the support positioned. You may need to tap it back the other way to get enough room.
When coming from the front, be sure to put the washer, support and other washer against the frame before inserting the bolt, or you won’t be able to get the the support past the steering rack.
Shock Bolt Side
The procedure is the same for the shock bolt. If both the shock and pivot bolt are oriented the same way, then tap the original bolt until it’s flush, position the partially-mounted support, line up the new bolt, and tap it though.
Remember, the order of the parts for the shock side is: washer, support, bolt. There is no washer between the control arm and the bushing, since the bushing doesn’t rotate against it and won’t squeak.
If your bolts go through in opposite directions, then you’ll repeat the procedure from the pivot side: tap the bolt flush, then put the lower side of the new support against the control arm, and then put the washer on and bolt through the hole where the old shock bolt was.
Now you just tap them in. I say “just”, but I found this more likely to go out of alignment than the pivot end. This is further complicated if you have older shocks that have separate sleeves on each side, since that triples the points for misalignment. A pry bar and a punch can help you line everything back up.
Attaching the Other Side
You can now attach the supports to the remaining bolts. In the case of bolts going in opposite directions, You’ll portably have to tap the bolts back until the threaded ends are flush, then line up the ends of the supports before tapping the bolt back through. Don’t forgot the extra washer that goes between the frame and the bushing on the pivot side.
If they go through in the same direction, this is easier — slide the other support on, and you’re done.
Of course, it’s not actually that easy. My car had the bolts installed in opposite directions, and while I had no problem getting one of the supports fully seated, the second one caused a problem in that it was slightly misaligned with the control arm. I don’t think there was a problem with the support, but rather that the control arm was being flexed forwards slightly, possibly by the sway bar. In both cases I had mounted the pivot bolt side first, and had to figure out how to get the shock side on. Jacking up the suspension got things mostly aligned, but not quite.
You have a couple of options here. You can remove the sway bar and see if that helps, as it should give you some more front-to-back play. I didn’t think of that, so I put a large pry bar between the frame and the support and pull it forwards. This compresses the bushings slightly and gives just rough play to get the bolt in. The driver’s side required a larger pry bar to get enough leverage to line up the holes than the passenger side did. I lined everything up with a punch, then held the pry bar with one hand while I tapped the head of the bolt in with the other hand. A bit of a pain, but I did get it to work.
The DeLorean Industries supports don’t have this problem — since they’re adjustable, you simply adjust the turnbuckle until the bolt fits.
After jacking up the suspension a little for shock and control arm alignment, I used a pry bar between the support and the frame to get the hole to line up with the shock bolt.
Everything installed on the passenger side, ready to be torqued.
Finishing Up
Put the end washers and nylocks on, but don’t tighten them yet. The suspension should be tightened under load, as though the car were on the ground. The easiest way to do this is to jack up the car from under the lower control arm, and keep jacking until the car body just comes off the jack stand or lift pad. At this point that corner is being supported by the suspension, and you can torque both nuts to 65 ft lbs, as per the Workshop Manual.
Put back on the tires, and you’re good to go.
You’ll need a 22mm wrench to hold the new bolt head while you torque it with a 19mm socket.
The sliver of sunlight between the frame and the lift pad shows that this corner of the car is supported by the suspension (on a jack stand).
Torquing down the shock bolt with the suspension loaded.
Swap Bar Tweaks
While I was there, I tweaked the sway bar a little. I found that the driver’s side nylocks wasn’t as tight as I’d expected. I had incorrectly sized washers behind the nylock, so I replaced them with larger ones that more evenly distributed pressure against the polyurethane bushings I’d installed previous. I also torqued the nylocks down with the suspension loaded Loading the suspension makes it easier to get the rear bushings in too, since the ends of the shaft are more parallel with the body of the car. I also installed cotter pins. While not strictly necessary with nylocks, the stock setup had two thin nuts that lock against each other and also used the pin, so the hole was already there.. After my ball joint mishap I decided to play it safe.
Final Thoughts
I don’t know if it was the sway bar tweaks, retorqueing everything, or the new supports, but the suspension feels much more solid now, and I noticed my steering wheel play has reduced a bit (I don’t think I’ll ever get rid of it completely). The last of the vibration is almost completely gone, with a very slight pulsing felt when breaking. I’m pretty happy with how it turned out.