Repairing a Seized Brake Caliper
Joe Angell
I finally took my rebuilt exhaust system and new suspension (front, rear) for a test drive. While the exhaust is quiet and the suspension feels good, I had to cut the trip short.
First there was the burning smell coming from the back of the car. Then I couldn’t get over about 55 MPH. And then my brakes started feeling soft. At one point I noticed smoke wafting forward from the rear right of the car.
Back home I found a trail of fluid trailing behind the right wheel and smoke pouring off of it. It doesn’t show up very well in a photo, but you can see it very clearly in the video I made showing how I fixed it.
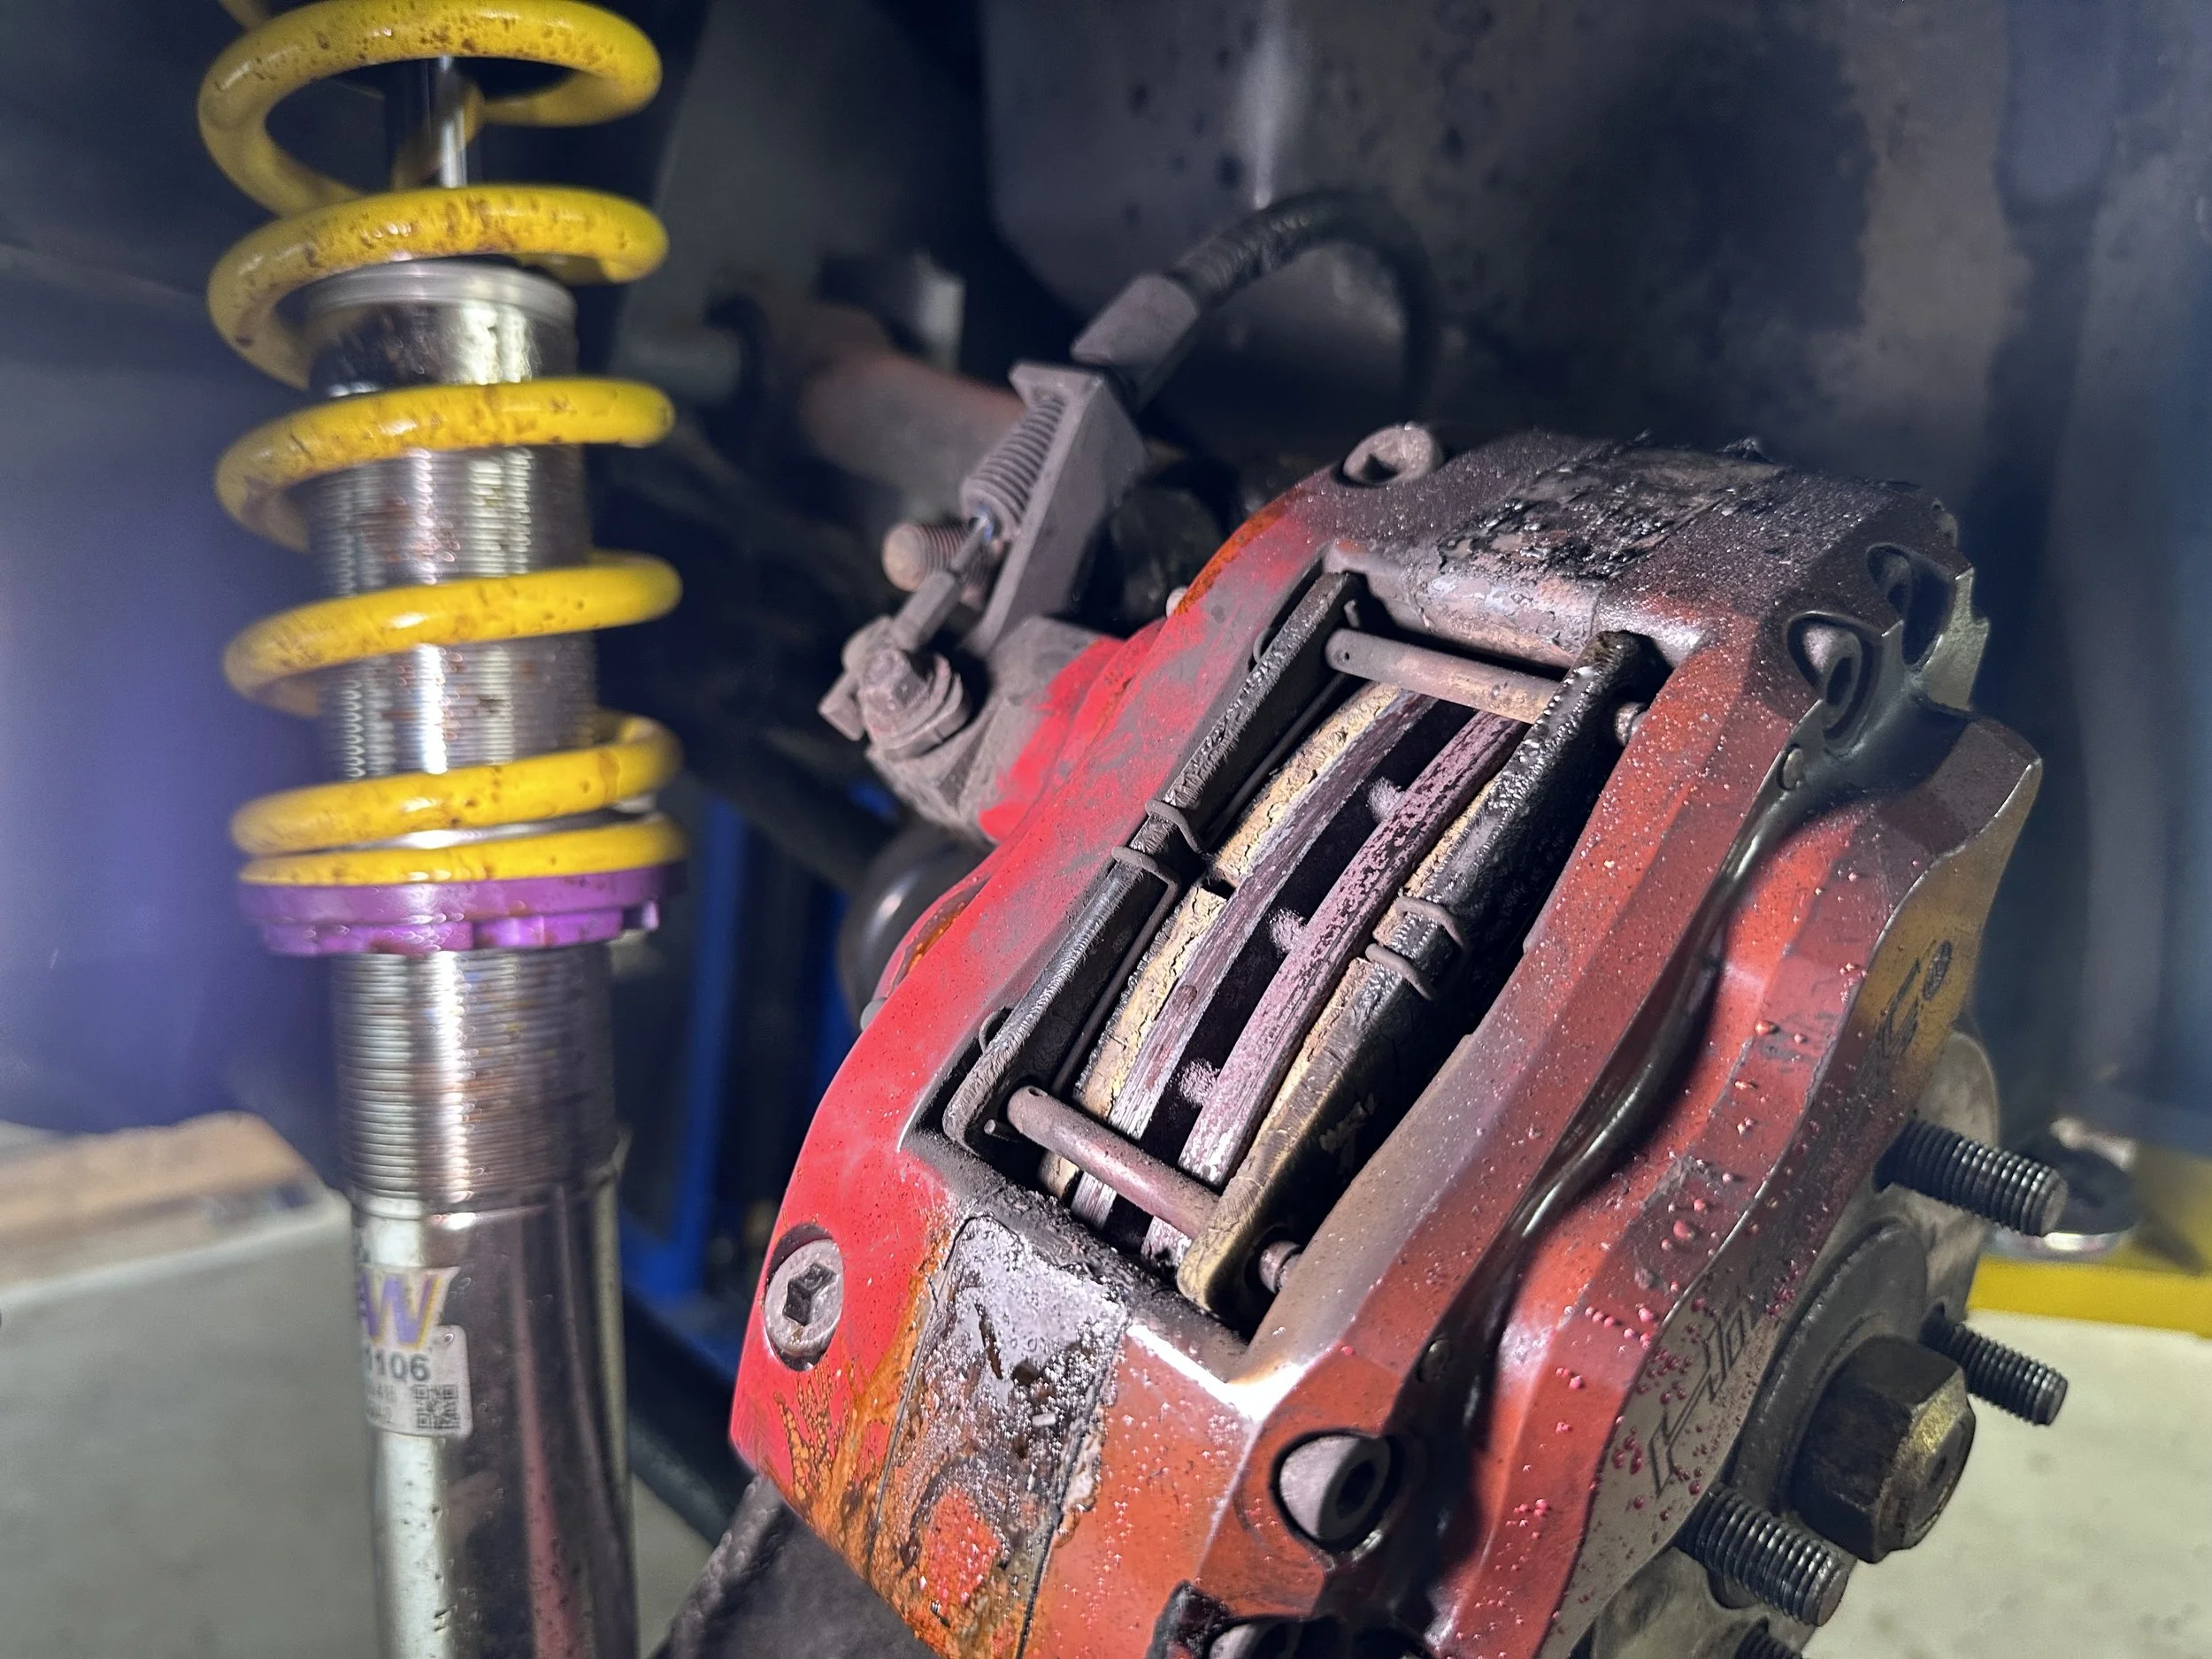
Everything on the rear right wheel was hot. There was no fire, but I almost burned myself taking off the lug nuts. The heat from the rotor could be felt two feet away. The paint on the caliper was bubbling and the strain relief on the brake line had melted.
Bubbling paint from all the heat.
The ruined stain relief on the red brake line can be seen to the right of the caliper.
The brake pads should be fine, but the seizing needs to be figured out first.
The heat had caused the banjo bolt on the brake line to come loose, which explained the trail of brake fluid. I could have removed the line with my fingers if it wasn’t so hot.
I found the wheel weights on the ground — the heat had melted the glue on the tape that held them to the rim.
The wheel weights I found on the floor. The glue of the tape was melted by the heat.
The Brake System
I have Martin Gutkowski’s Big Brake kit. The calipers and rotors are made by HiSpec in the UK. While HiSpec’s parts are very nice, they are also nearly impossible to get ahold of via email, and I didn’t feel like calling the UK, so I just bugged Martin. He was extremely helpful with diagnosing the problem, and is the main reason I got this up and running so quickly.
Disassembly
It was pretty clear that something was wrong with the caliper, so I had to take that apart.
Once everything cooled down a bit, I took the caliper off. The dust boots took some damage, with one being completely destroyed.
This dust boot was completely ruined by the heat. The other may be OK.
These boots are damaged, but not completely destroyed.
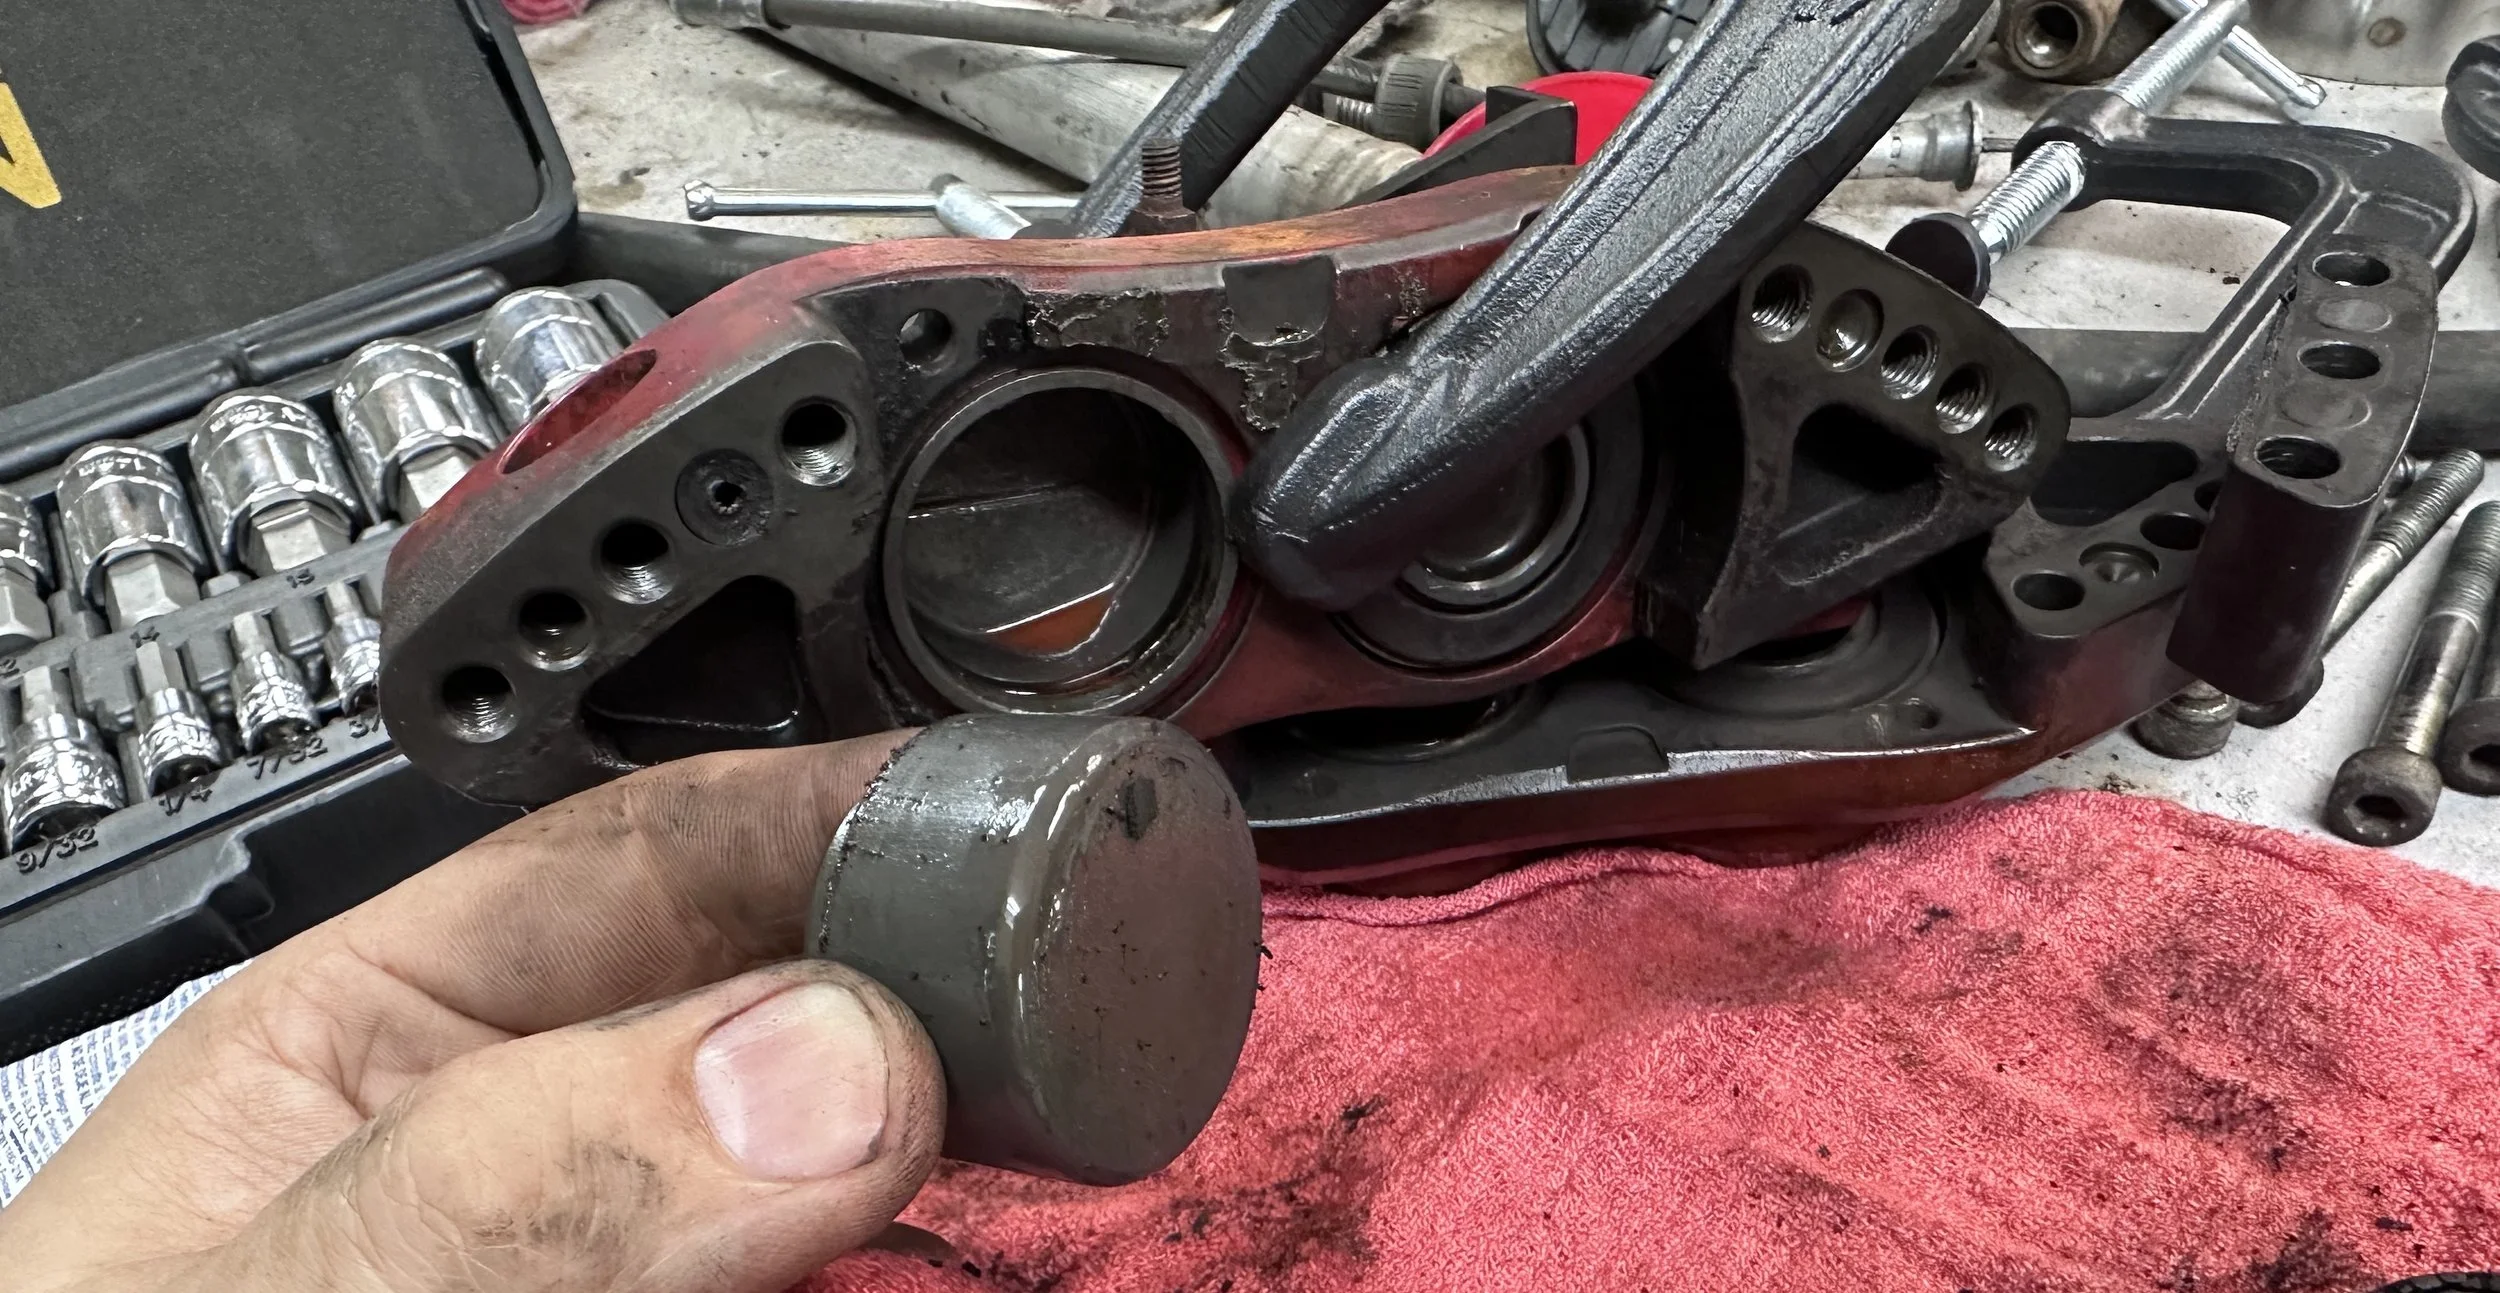
Taking apart the caliper isn’t very hard. The four-part billet aluminum body is held together with six socket-cap screws. There are round seals that keep the fluid from leaking out from between the parts. At first, I thought these were special discs until Martin pointed out they’re just O-rings that got squashed into this shape by the caliper body. They no longer sealed when reassembled, so I ordered replacements from McMaster-Carr. Martin had me make sure to get rings made of EPDM rubber, since brake fluid will eat most other forms of rubber.
The disassembled caliper.
The crushed O-ring that seals the two halves (second hole from the right).
Removing the Pistons
The easiest way to get the pistons out is by clamping down three of them and using compressed are on the inlet to pop the other one out. This is the same way that brake fluid would push them out.
I checked all the pistons and their O-rings, and they looked fine. There was no obvious damage, and they all seemed to seal properly, given that I was able to pop the pistons out so easily with air.
I assumed there was some kind of blockage in there — say, from some debris in the brake system — but the fact that compressed air seemed to get in and out without a problem suggested that everything was fine.
One of the pistons. The O-ring can be seen in the chamber behind it.
So I put it back in the car and tried to bleed the system. I got nothing, and by “nothing” I mean no air and no fluid. I removed the bleeder screws entirely and still nothing. I disconnected the brake line just to prove that there was fluid in the system, and there was.
This meant that there must be a blockage somewhere. But air worked fine — it was just brake fluid that wasn’t making it through. The question was why.
The Emergency Brake
The only part I hadn’t checked was the emergency brake. I never use the e-brake, because I don’t need to with my automatic transmission, so I didn’t expect it to be the problem.
While the stock calipers have a completely independent mechanical e-brake, the HiSpec ones use a hydraulic system that uses the same brake pistons and pads as normal braking does. The way this works is through a plunger behind the piston closest to the inlet. It seals off the flow of fluid out of the caliper while also pressurizing the fluid inside.
I removed the body on the back of the caliper to access the plunger, but it comes out from the other side. Unfortunately, I stripped one of the six socket cap screws that hold the e-brake body to the caliper. Much to my surprise, I was able to get it out with an extractor — I think that’s the first time that has ever worked for me — but I had to go to McMaster-Carr to get replacements, as I couldn’t find them locally.
To actually remove the plunger, you have to remove a cap behind the piston. This is held on with Torx-style security screws with a post in the middle, but I have a security bit set that was able to handle that without issue. Behind the cap is a pair of springs that I managed not to lose, and the plunger itself.
The two springs behind the cap that return the e-brake plunger to its disengaged position.
The plunger has two O-rings on it. The one closest to the cap was clearly damaged. I still didn’t see how this would cause a problem until I tried to clean the fluid passages inside the caliper.
The obviously ruined O-ring on at the end of the e-brake plunger.
The Problem
The passages are incredibly small. The main inlet passage also exits directly in front of the e-brake plunger. The ruined O-ring was blocking that port. High-pressure brake fluid and compressed air could flow past it, but lower-pressure fluid couldn’t flow back out, effectively seizing the caliper.
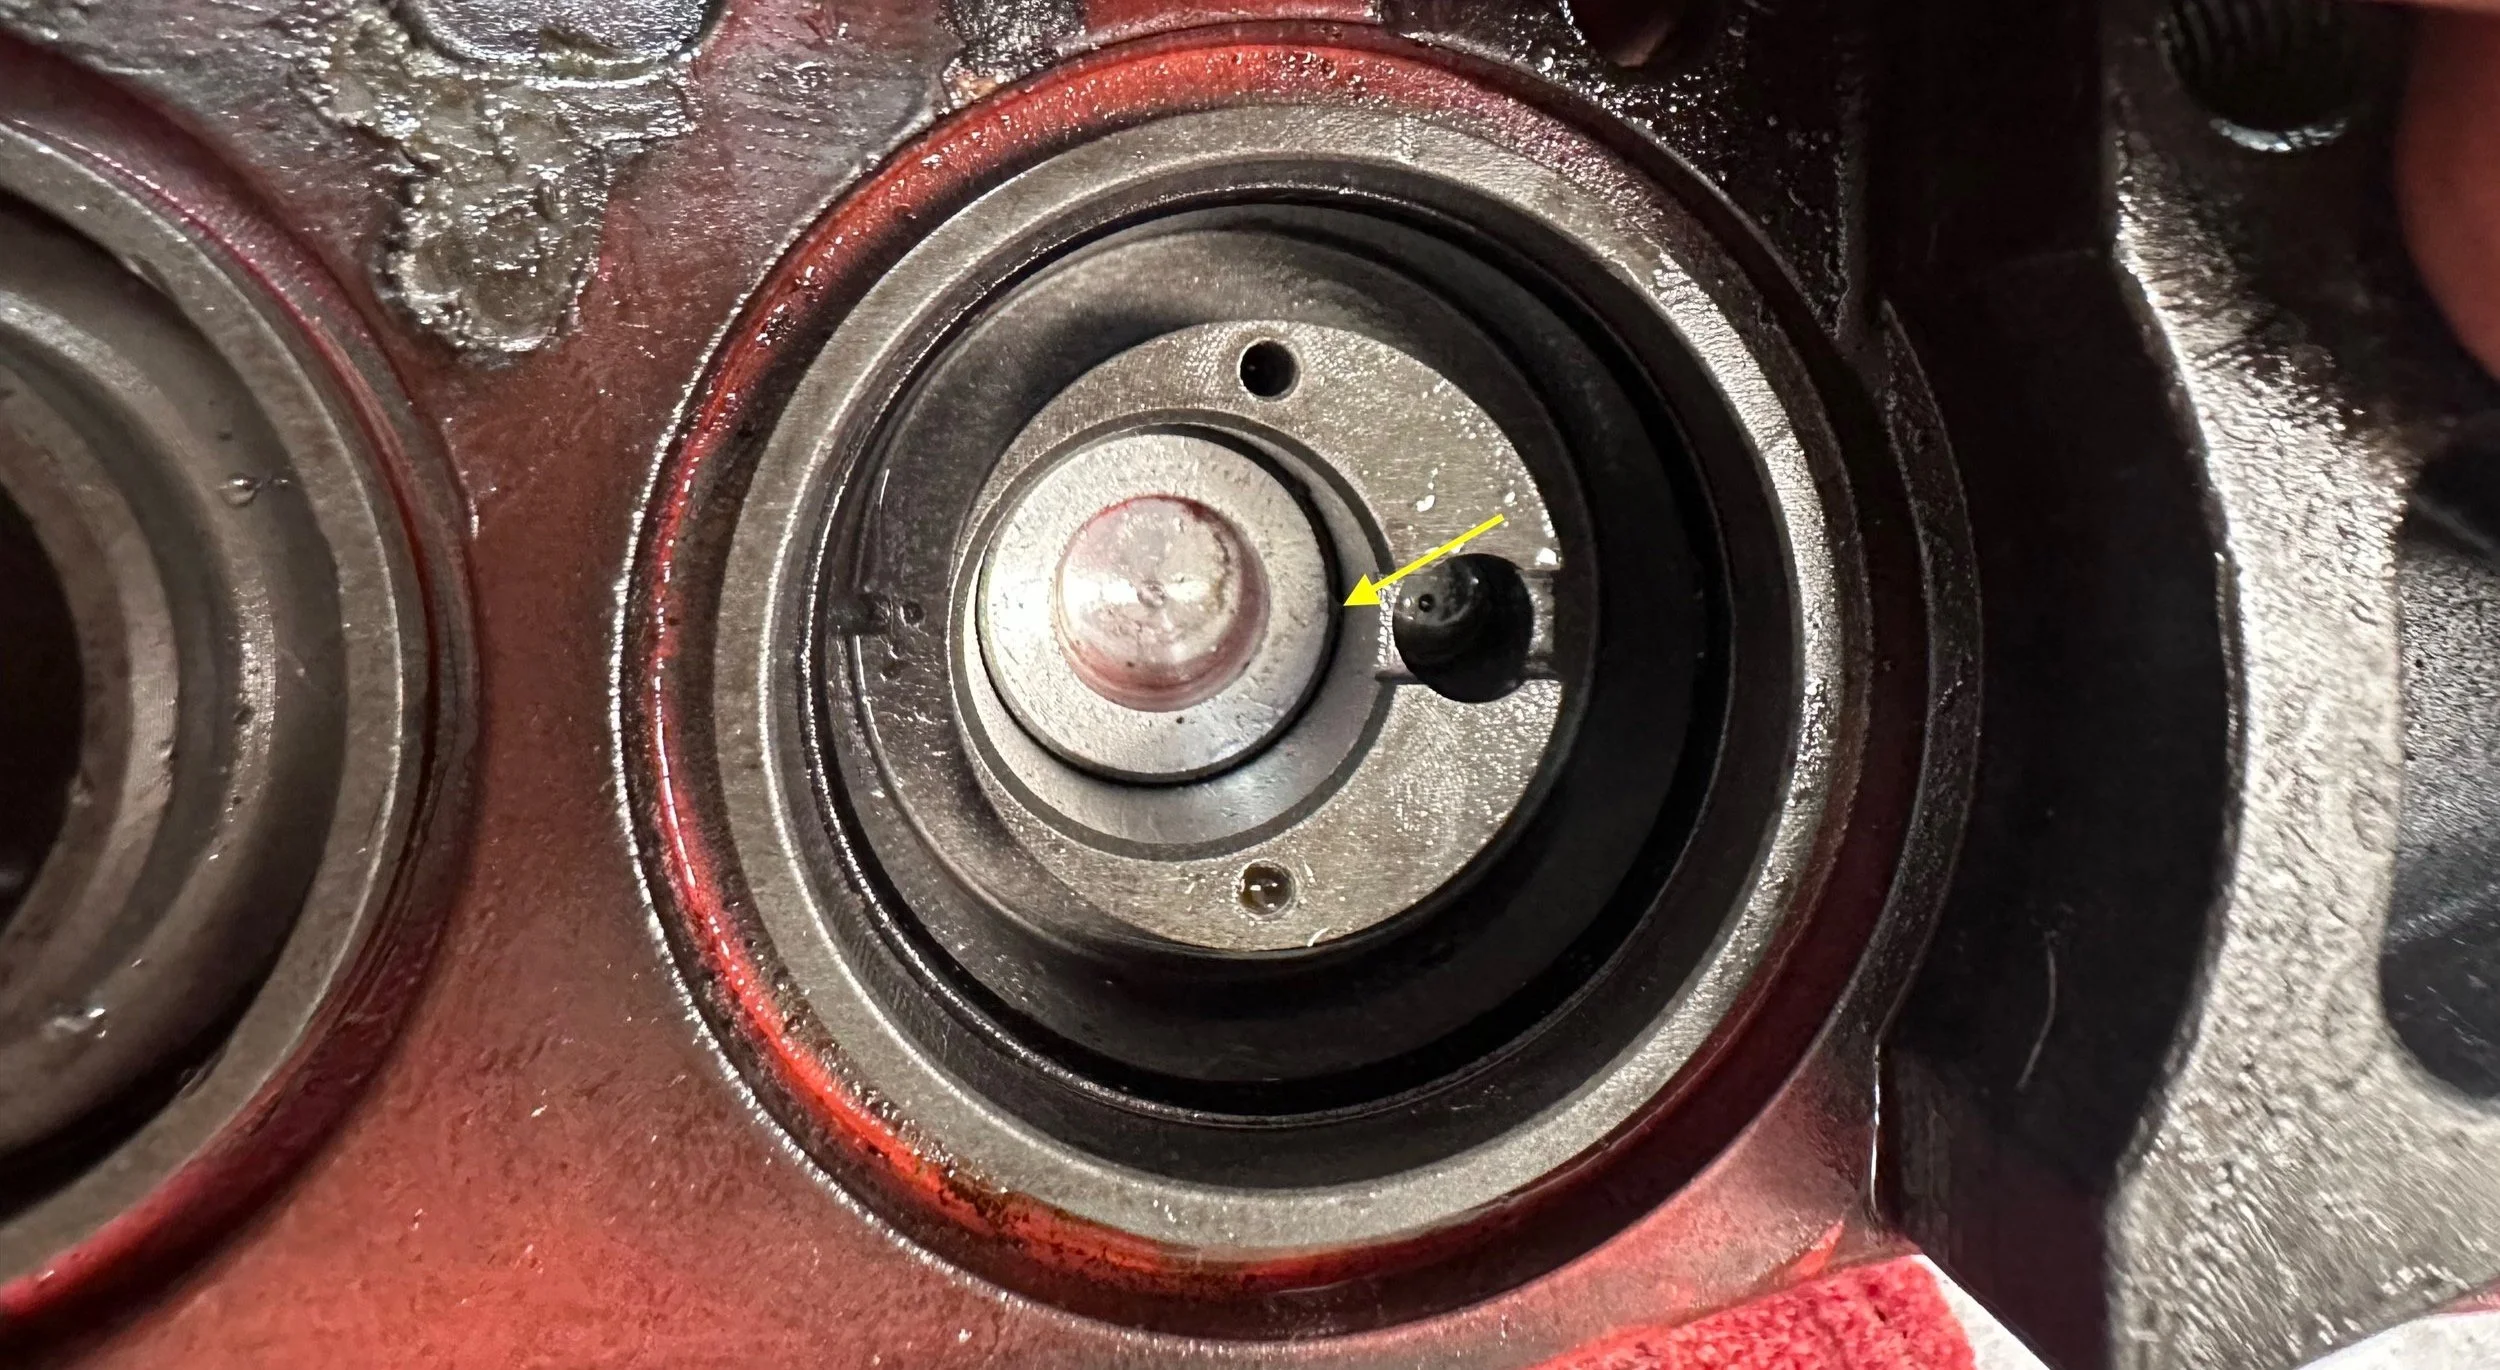
The tiny passage that the brake fluid flows into the caliper through.
This leads to the obvious question: why didn’t I see this when I tried to bleed the brakes?
The traditional way to do this is that one person presses the brake pedal while another person turns the bleeder screw on the caliper. This means the full pressure of the brake system is used to bleed.
I do it a different way, using a PowerBleeder. You fill it with brake fluid, pump it up to 10-15 PSI, then turn the bleeder screw to bleed the system. It can be done by one person, and it operates at a much lower pressure than the brake pedal — so much lower that it couldn’t push by the bad seal.
The Fix
The correct way to fix this is to replace the O-ring. I could not find this size ring in EPDM either locally or at McMaster-Carr, so I did the hack fix: I swapped the two O-rings on the plunger. This isn’t a great fix, but it solves the immediate problem. Since I rarely use the hand brake it’s probably fine, but I should properly replace it at some point.
I put everything back together, which meant adding a bit of RTV around the e-brake body to replace what was previously there, and put it back in the car. I reused the old brake pads. They were actually brand new, but the heat had tarnished them a bit. I was pretty sure they were fine — they’re specifically designed to handle the high heat of the brake system — so I’m not worried about them failing on my.
My “fix” of just swapping the two O-rings. I’m sure it’s fine…
The Brake Line
The last thing I had to deal with was the break line. I think the damage is only cosmetic, but I didn’t want to find out I was wrong and lose my brakes again, so I replaced it. The local auto parts store had a cable that was close enough. It had the correct banjo fitting on one end and the correct threads on the other, and was the right length.
The two bits of weirdness were the extra flange in the middle, and the lack of a hex fitting on the threaded end. I mostly ignored the flange, although I did zip-tie it to the trailing arm to keep it from rattling around. The hex fitting was more annoying, but I just held it with some vice grips near the threads (so that I’d be gripping the metal connector inside the hose and not the hose itself) while I tightened it down.
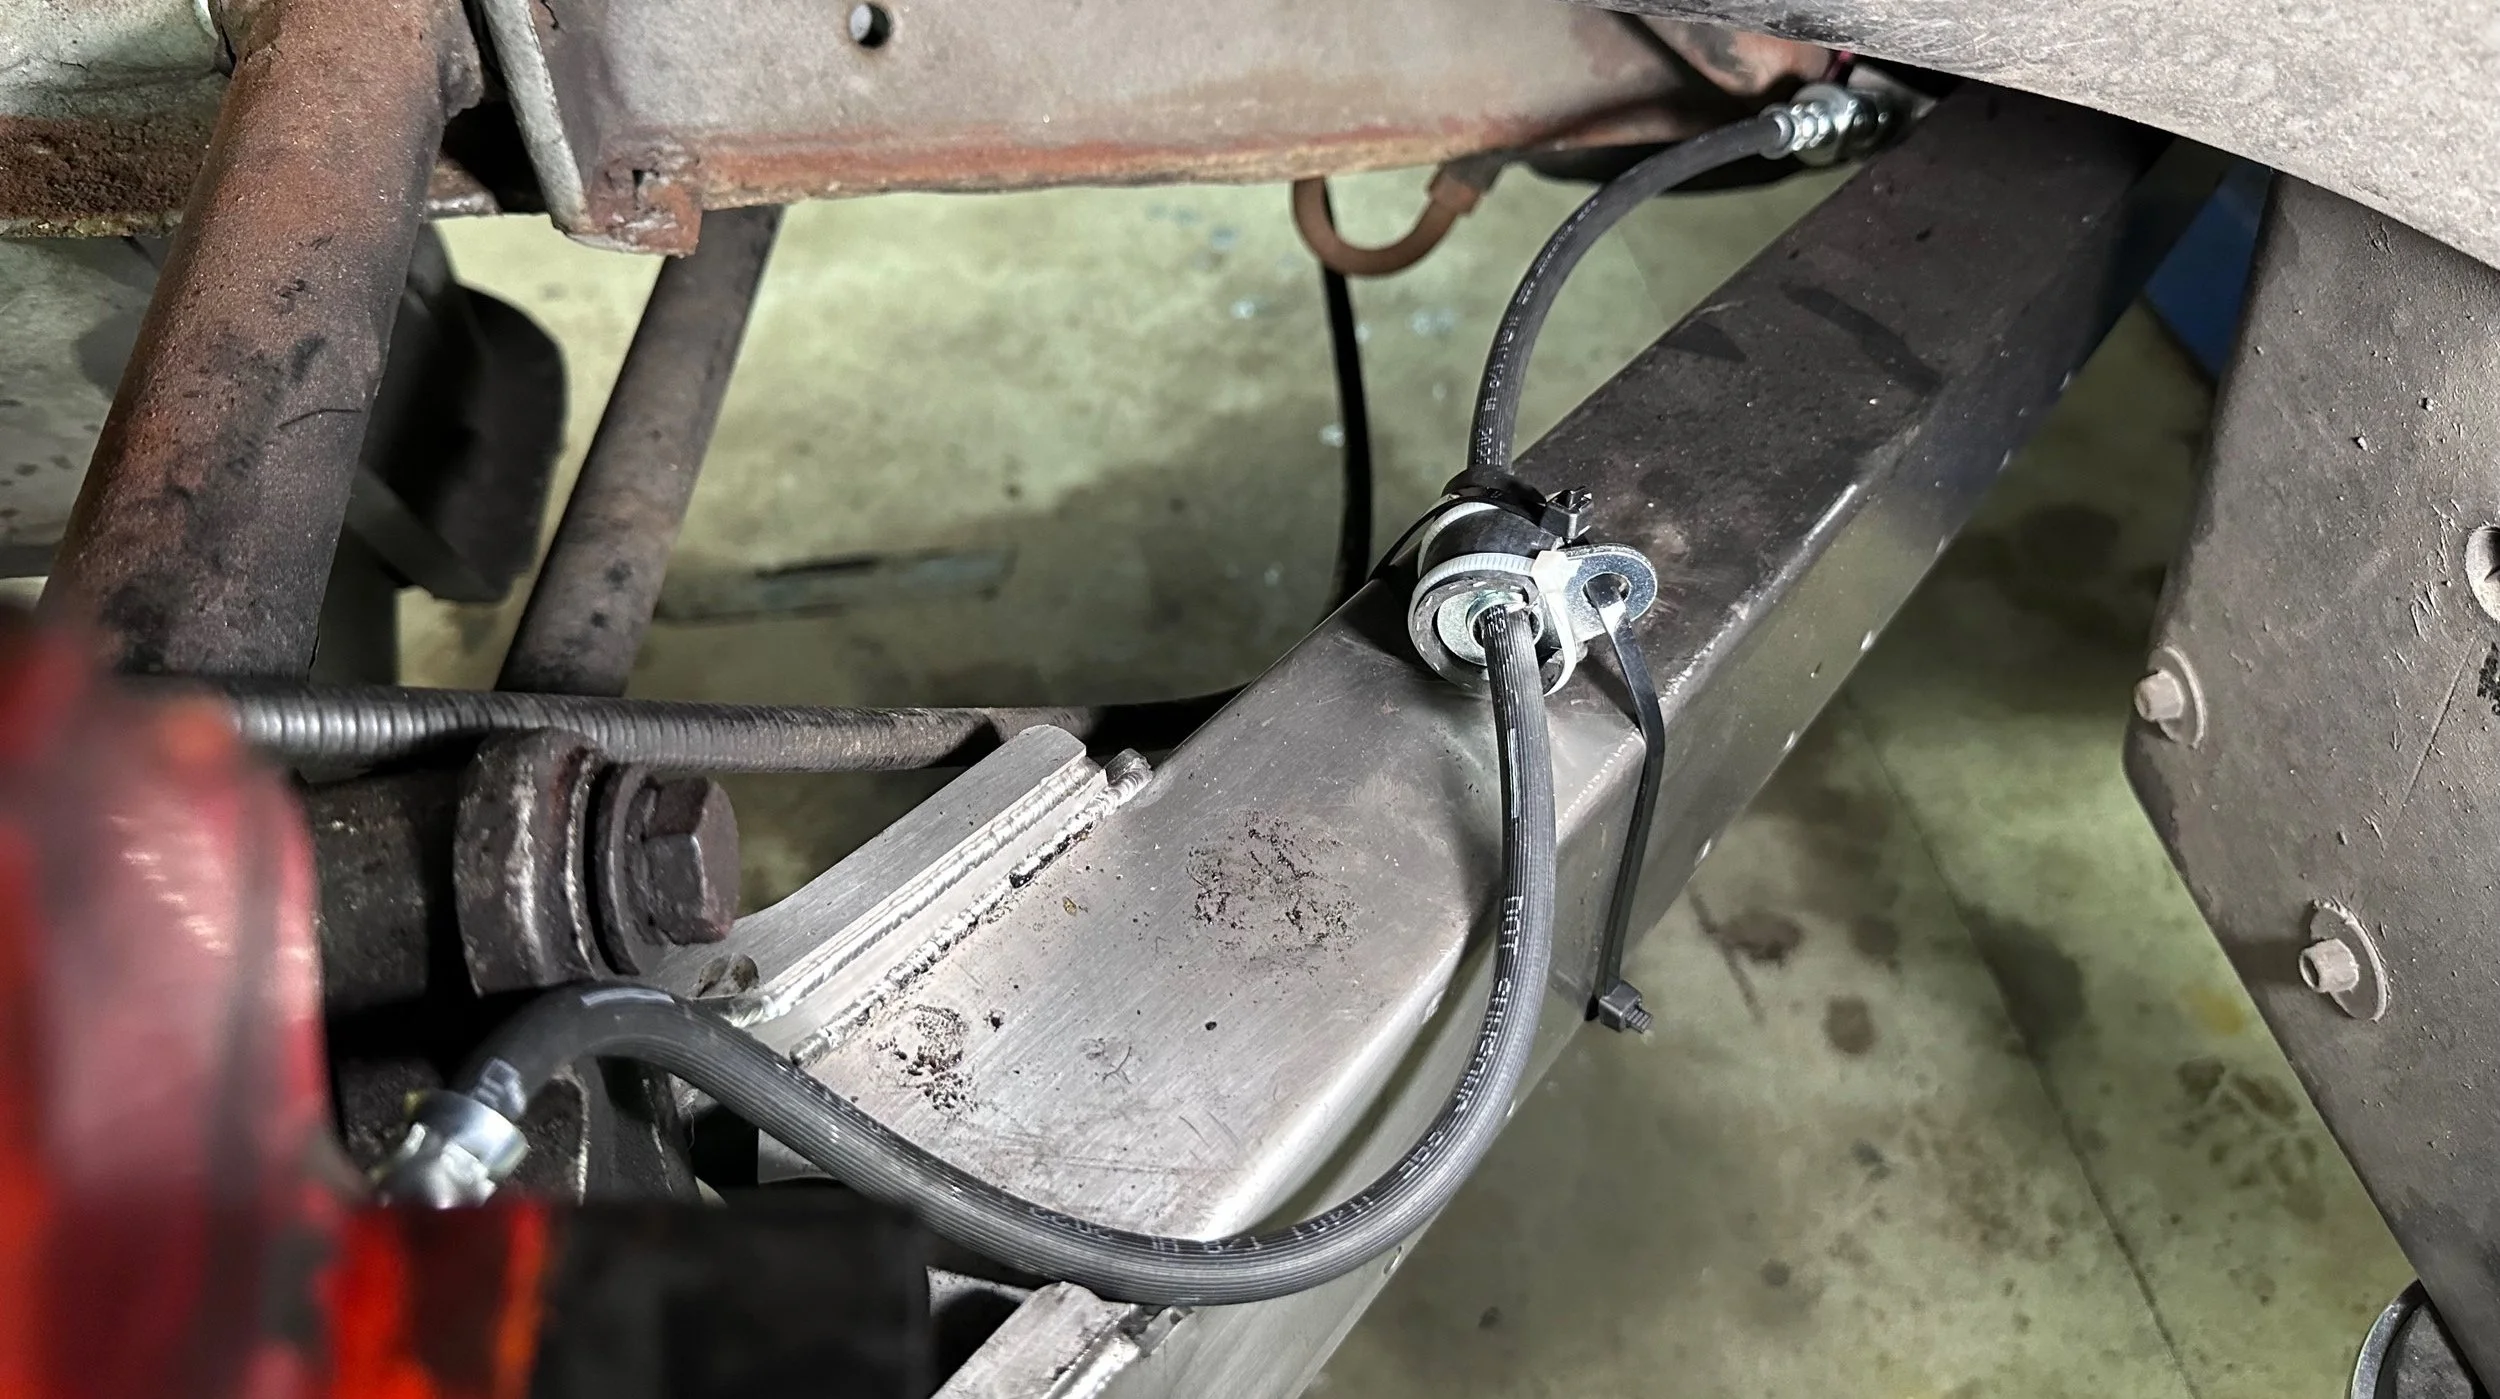
The new brake line, with its bonus flange zip-tied to the trailing arm. Close enough.
Results
I bled the system, went for a test drive, and everything worked. The brakes are good, and I’m all set to take it on any trips that come up. I should replace that O-ring at some point, but it should be fine as-is.
Many thanks to Martin for helping me get this running again!