Bracelet Rack
Joe Angell
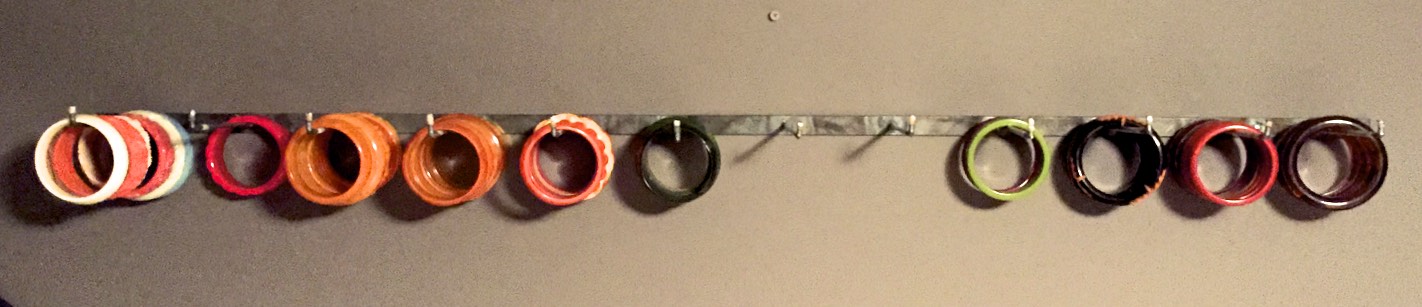
I needed a new welding project, so I asked Zoe if she had any ideas. She collects bakelite bangles from the early 20th century, but has trouble organizing them, and asked me to build a wall-mounted rack.
Design and Construction
The rack design is pretty simple: just some pegs on a flat piece of stock, really. It was about $30 worth of parts at Home Depot, including the screws to mount it to the wall. The flat stock was 1/4" thick, an inch wide and three feet long and about.
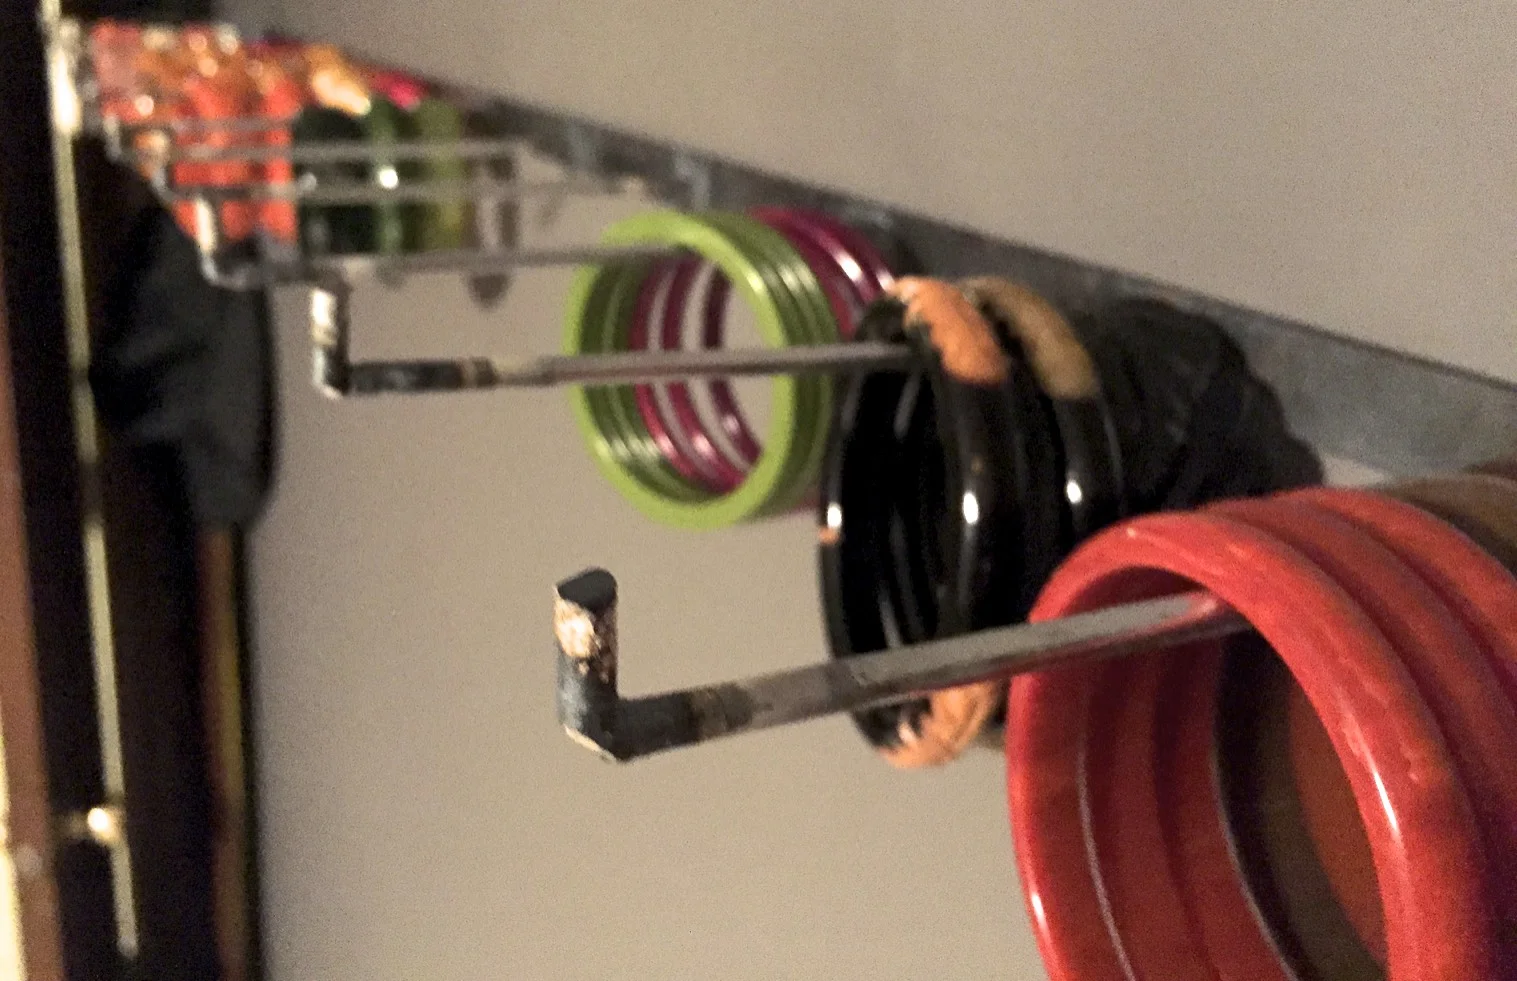
The pegs were fashioned form some 1/4" zinc-coated steel rods. Each was cut to six inches long, and was welded at four inch intervals along the stock. To hold the pegs in place while I welded, I used my house-shaped welding magnets, holding a peg in one of the eaves sticking off the edge of the "house".
I was a bit concerned about the bracelets sliding off the ends of the pegs, so I bought some washers and tried to weld them onto the ends. The washers were such soft steel that the torch very quickly liquified them. Through careful application of heat I was able to get them to mostly stick, but it wasn't really a great solution.
In the end, I simply made a hook by welding another piece of the 1/4" rod to the end of each peg. After welding, I cut the rod down to the correct size and ground off the rough edges. This worked much better, and is generally cleaner.
I tried to use the torch to melt two holes into the bar for wall mounting like I had for my desk shelving brackets, but that wasn't working this time; it just created a molten puddle, but wouldn't get hot enough to burn through the stock entirely. I also had to mount it in a vice to ensure that it wouldn't deform the stock and require straightening again. In the end I just used a hand drill, placing one hole on each end of the stock.
Welding Issues
Besides the liquified washers, I had a few other small issues. Heating the stock to weld the rod to it caused it to warp in a few places, creating hills under the rods. I was able to fix these by heating the raised areas until they glowed red, and then applying upward pressure to the end of the stock to bend it back, and holding it until it cooled. This did a pretty good job of bringing the stock back to mostly flat.
In some cases the pegs weren't quite perpendicular to the stock after welding. This was easy to fix -- simply heat the base of the peg, and use a gloved hand to align the peg in the correct position. I was able to do the same thing for the hooks, pushing them into alignment with a piece of scrap stock.
In some cases I had taken away a bit too much steel when heating the hooks, but it was easy enough to add more with the filler rod. The excess was easily ground away.
Finish
I did some minor grinding to take away some of the rough edges. I had planned on Plastidipping the entire work to hide some of the imperfections and provide a cleaner finish, but Zoe said she liked the brutalist sculpture style of the raw metal, so we left it as is. The zinc coating left some whitish discoloration on the pegs and hooks as well.